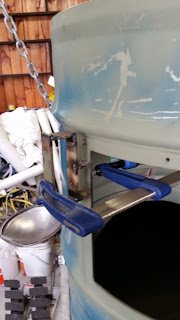
Fig. #1. In order to drill the holes in the window frames straight, I made up this little jig that gets clamped to the frame and then drilled with the hand-drill, before being tapped with a thread.
 |
| Fig. #1. 05/12/2016 |
Fig. #2. The jig clamped onto the front window frame. The holes aren't perfectly straight but much better than freehand (which I tried but then had to weld over).
 |
| Fig. #2. 06/12/2016 |
Fig. #3 & 4. Both the front and rear window frames with all their bolts. All that's left to do is drill the same holes into the 3mm thick perspex. I'll probably do this last thing before the pressure test so I can seal the windows on at the same time.
 |
| Fig. #3. 07/12/2016 |
 |
| Fig. #4. 09/12/2016 |
Next I hope to be designing in 3D the clamping mechanism to scale in Blender. I've ordered a few parts for it online, which should be here in a few weeks. Once this and the windows are on. It's ready for a pressure test!
No comments:
Post a Comment