Here I'm starting to cut out the levers actuating arm. It's made from 3 mm x 30 mm steel and will be 60 mm long.
 |
| 19/12/2015 |
Drilling the three 12.5 mm holes for a total slot length of 36 mm. A 12 mm bearing will slide inside the slot as the lever rotates.
 |
| 19/12/2015 |
 |
| 19/12/2015 |
 |
| 19/12/2015 |
 |
| 19/12/2015 |
The slot is filed out smooth and the curve at the end is to match into the lever hub and will need welding.
 |
| 19/12/2015 |
Cut to length and ready to weld.
 |
| 19/12/2015 |
Ready to weld.
 |
| 19/12/2015 |
It needs to be clamped down so that both pieces don't buckle at the join as it heats up. It needs to be nice and flat.
 |
| 19/12/2015 |
Tack welded and ready to try.
 |
| 19/12/2015 |
All together and working well.
 |
| 19/12/2015 |
 |
| 19/12/2015 |
 |
| 19/12/2015 |
I drilled some more holes in the white perspex so that the lever hub can be bolted to it and tested with the cables. Now it's time to get get the slot to move the cables as the hub rotates.
 |
| 19/12/2015 |
 |
| 19/12/2015 |
Here I've welded a washer to the end of some 6 mm SS 304 threaded rod.
 |
| 19/12/2015 |
The threaded rod will hold the 12 mm bearing that will run inside the slot.
 |
| 19/12/2015 |
The bearing in its place.
 |
| 19/12/2015 |
I decided to weld a sleeve to the inside of one the cable arms to beef up the pivot point. It is under a lot of stress with the tightened steel cables and was tending to bend against the rod which it was rotating on.
 |
| 19/12/2015 |
All welded. Just got to wait for it to cool.
 |
| 19/12/2015 |
The arm works a lot better now with the extra sleeve. It also helps to keep the right tension on the cable to.
 |
| 19/12/2015 |
Here I'm threading the guides to hold a 4 mm diameter grub screw. This will (okay, might) help in adjusting the holes depth for the steel ball that will verify the lever is centered.
 |
| 19/12/2015 |
 |
| 19/12/2015 |
All thread and the grub screws are in place.
 |
| 19/12/2015 |
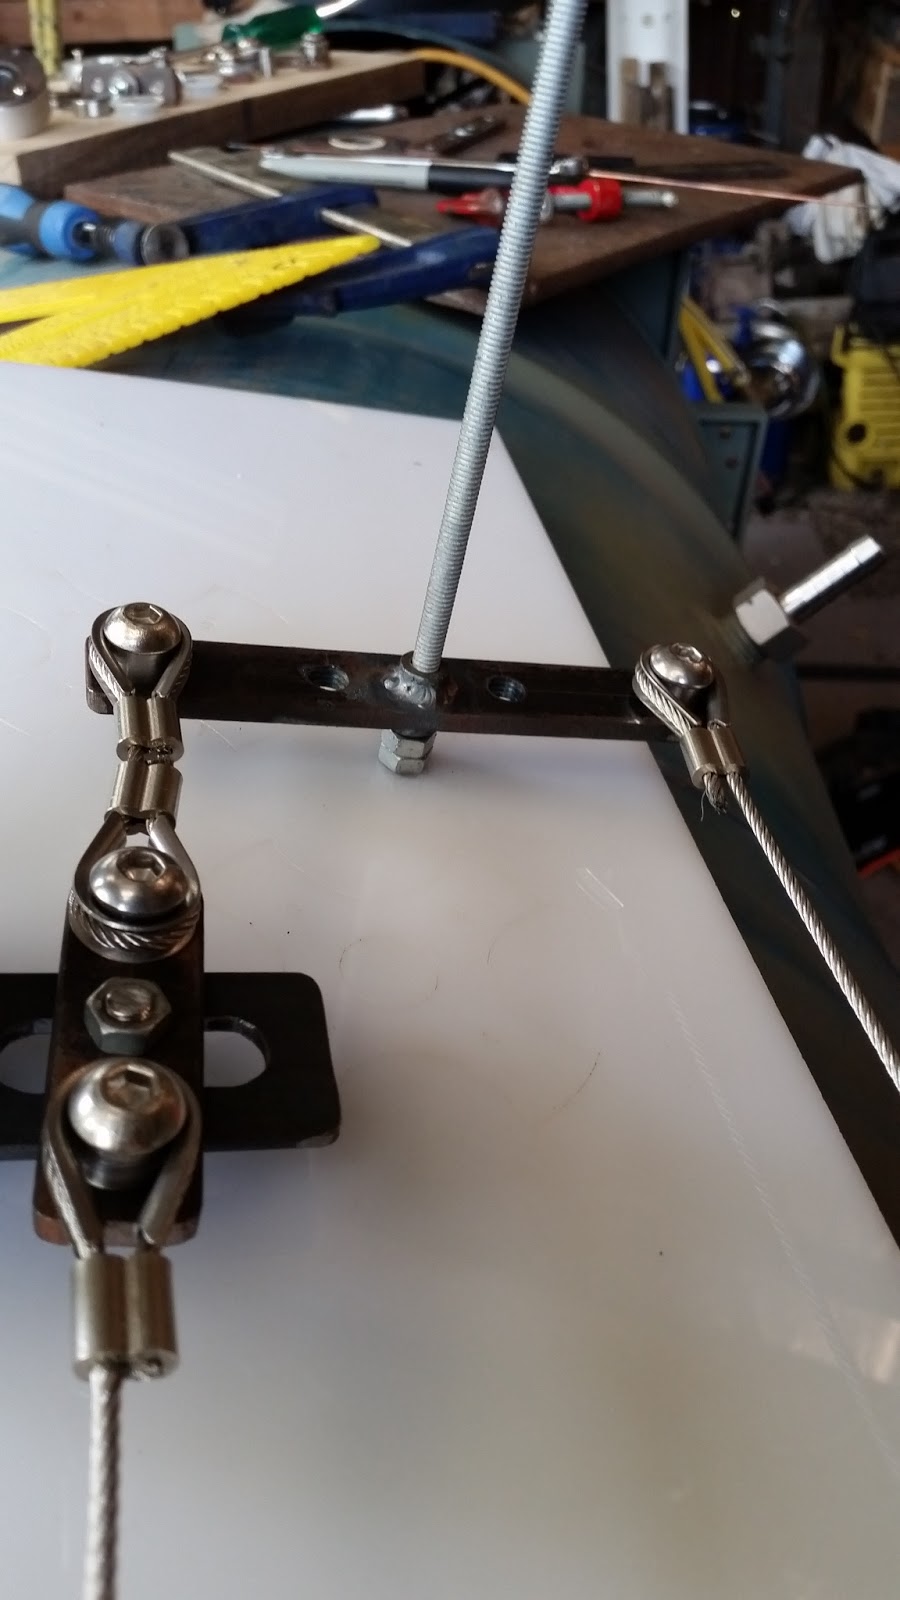
As the lever hub rotates it pulls the cables with it but it catches sometimes in the slot (because everything is just a bit too flexible) and causes jerky movement and not the complete range is was designed for. So I'm attaching an arm from the bare threaded rod in the center of the image up to the rod that is holding the bearing in the groove - so as the lever rotates, the arm will keep everything a fixed distance away, thus making the movement smoother and letting it rotate through its full range.
 |
| 19/12/2015 |
The arm is attached and working perfectly.
 |
| 19/12/2015 |
Here it is again as the lever has rotated to the maximum angle.
 |
| 19/12/2015 |
I found a bit of scrap perspex to make the other end of the unit so now everything is very rigid and working smoothly.
 |
| 19/12/2015 |
And here I've added in the second cable loop for the Elevator controls which will be next.
 |
| 19/12/2015 |


No comments:
Post a Comment